Account Analysis Forms
Account Analysis Forms are the works carried out to determine the standards and feedbacks such as the service you provide, the products you sell, the quality of a job. Workcube offers a very powerful analysis form design tool in Customer and Supplier Management. Thanks to the analysis form design tool, an unlimited number of forms can be created for each account category.
Route: Marketing > Account Analysis Forms
Analysis forms created and published in the analysis form design tool are displayed with their titles ready for evaluation on the "Account Details" page of the accounts in the relevant category. These account analysis forms can be filled in with the answers from the Customers via the Call Center, or they can be submitted online via B2B/B2C sites and filled online.
When the Analysis button in Customer and Supplier Management is clicked, all member analyzes registered in the system are listed with their titles.
By clicking on the analysis titles in this list, the analysis results page can be reached. The update screen of the form can be accessed by clicking on the icons at the level of the analysis titles.
It is possible to evaluate the Customers and Suppliers with the analysis forms prepared in the "Account Analysis Forms" sub-module and to have additional information about the members. On the Account Analysis Forms screen, the analysis forms that can be used for that account are listed with their titles according to the category.

Creating an Analysis Form
Click on the "+" icon on the Account Analysis Forms screen to create a new analysis form.
The "Account Analysis Forms" adding screen will appear.
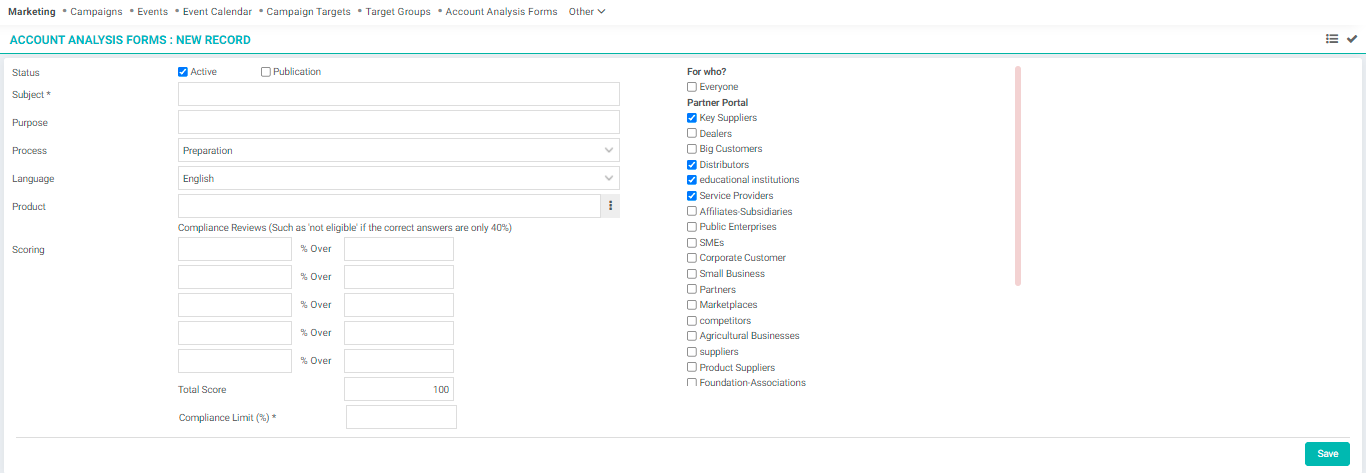
On this screen;
In the section on the right, there are Account categories under the Partner Portal title and Contact categories under the Public Portal title. According to the selections made here, the AccountAnalysis Form to be created will be automatically displayed on the detail pages of all accounts in the relevant categories.
Select the boxes next to the account categories for which the Account Analysis Form will be used. If the form will be used for all members, make sure the "Everyone" box is selected.
Checking the "Active" box indicates that the form is active.
By selecting the “Publication” box, you can choose which site to publish on in the website field that will appear on the right.
Note: Active and passive forms are displayed in the "Account Analysis Forms" list. However, passive forms are not displayed on the "Account Details (Member Management)" page, even if they are live.
If this box is selected, the form is displayed in the "Analysis" section of the relevant account detail pages and becomes fillable.
- Type a subject title for the account analysis form.
- Specify the purpose of using the account analysis form.
- Select the process of the account analysis form and the language in which it will be published (which will be displayed on the calendar page).
- You can select a product in this field to associate the account analysis form with the product. For example, if an analysis form is to be prepared for dealers regarding the sale of a product, the relevant product can be selected here.
In the case of scoring forms, the system calculates the percentage of accuracy (Compliance) over the total score based on the answers given. According to the percentages specified in this section, the comments written on the side are displayed as the analysis result. Even if the Compliance Reviews field is not filled, the "Total Score" field must be filled.
In the "Compliance Reviews" section, write the response percentages in the left-hand fields, and the success and/or Compliance Reviews of these percentages in the right-hand fields.
In the "Total Score" section, enter the minimum Compliance Limit of Compliance (success) in the "Compliance Limit" field.
Warning: While preparing the analysis forms, a certain score can be calculated, or forms that do not have any score calculations can be prepared. While filling out the forms for which the score is calculated, you can score yourself in line with the answers to the open-ended questions.
After specifying the required information, click the “Save” button.
When you click on the Save button, the “Analysis” screen will appear where you can add questions for this analysis, see the answers of the participants, and update the analysis information.
On this screen, you can add questions for analysis. Click the “+” icon at the end of the “Questions” field to add a question. The “Add New Question” screen will appear where you can add a question.
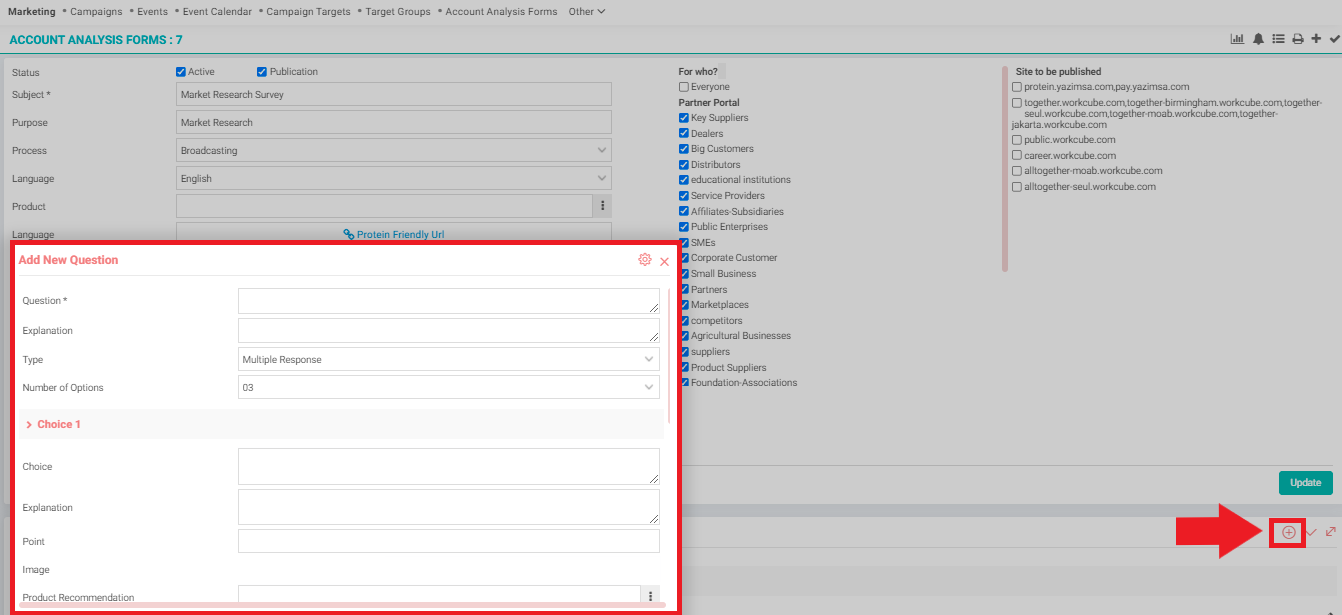
You can add an explanation for your question in the explanation field.
In the Type field, select the type of response that the members will give.
You can add a single response, multiple response, or open ended question.
- Single Response Questions: In this type of question, it is possible to choose a single option from among the options.
- Multiple Response Questions: In this type of question, a single option can be selected from among the options, or more than one option can be selected.
- Open Ended Question: Select this when you want the account to answer without any options.
Warning: More than one answer option can be selected for Open Ended Questions. For example, if the number 3 is selected in the revenue question for the last three years, 3 separate open-ended answer fields appear under this question when filling out the account analysis form.
In the Number of Options field, the number of options is specified for single or multiple answer questions. Choice, explanation, point, image, and product recommendation fields will be added as much as the number of selected options.
Warning: Fields under multiple response and open ended questions are not visible on the analysis form detail page. These fields are displayed when filling out the form from the account detail.
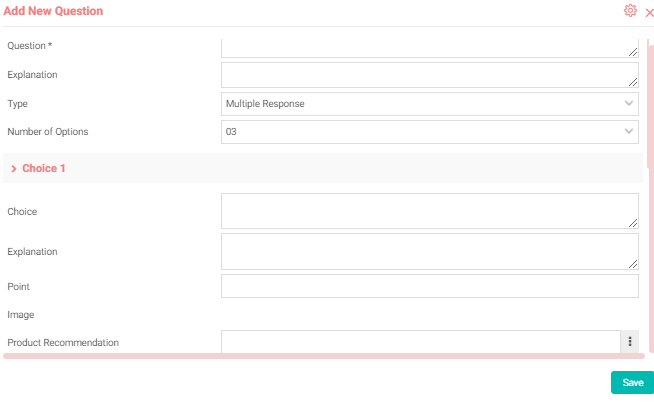
After typing the names of the answers in the Choice field, you can add explanations.
Specify how many points will be received if this option is selected from the score field.
You can add an image for the choice in the image area.
You can use the Product Recommendation field if you want to recommend a product if that option is selected.
Warning: In account analysis forms, points can be given to response choices, or they can be prepared in non-scoring forms. The scores you write in the score section are automatically collected according to the answers given while filling the "Analysis Form" for the relevant account and are displayed in the score section in the Analysis Results list. Scoring for open ended questions should be written manually by the person making the assessment, not while creating the form, but according to the answer given to that question while filling out the form. This score is added to other single or multiple response question scores.
After specifying the question and options to be used for account analysis, you can save the question by clicking the "Save" button.
You can update your question by clicking the "Update" icon at the end of the line in the Questions section.
You can do the following with the icons in the upper right corner of the account analysis form;
Results: You can add analysis results from the account's update screen, or you can add a form result or view the form results by clicking the "Results" icon on the update screen of the account analysis record.
You can go to the "Account Analysis Forms" page by clicking the list icon and listing forms. With the help of other icons, you can print and save your form or go to the relevant page to add a new form.
To update the form you have prepared, you must click on the "Update" icon at the end of the form on the listing page.
Filling the Analysis Form (Making Account Evaluation)
To fill in the forms you have prepared according to the answers from the accounts, click on the "Results" icon in the upper right corner of the relevant analysis form update page.
The analysis result screen of the form you are on will appear on the update page.
Click on the “+” icon to add analysis results according to the data you have (answered forms).
The “Analysis” screen will appear, where you can specify the participant for the analysis form.
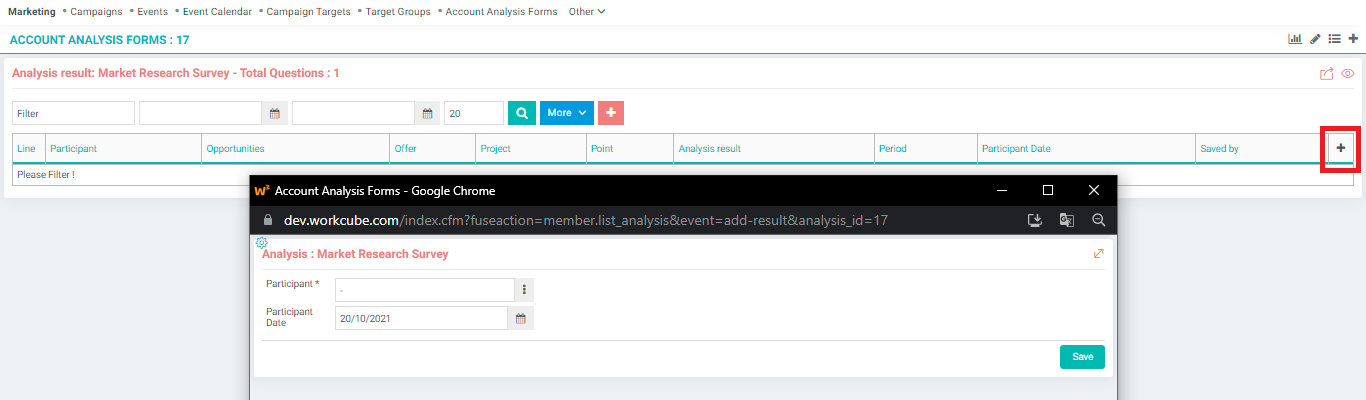
On this screen, you can specify the account information that responds to the form you have. After selecting the relevant account, click the “Save” button. When you click on the Save button, the "Analysis" screen will appear where you can specify the account's form results.
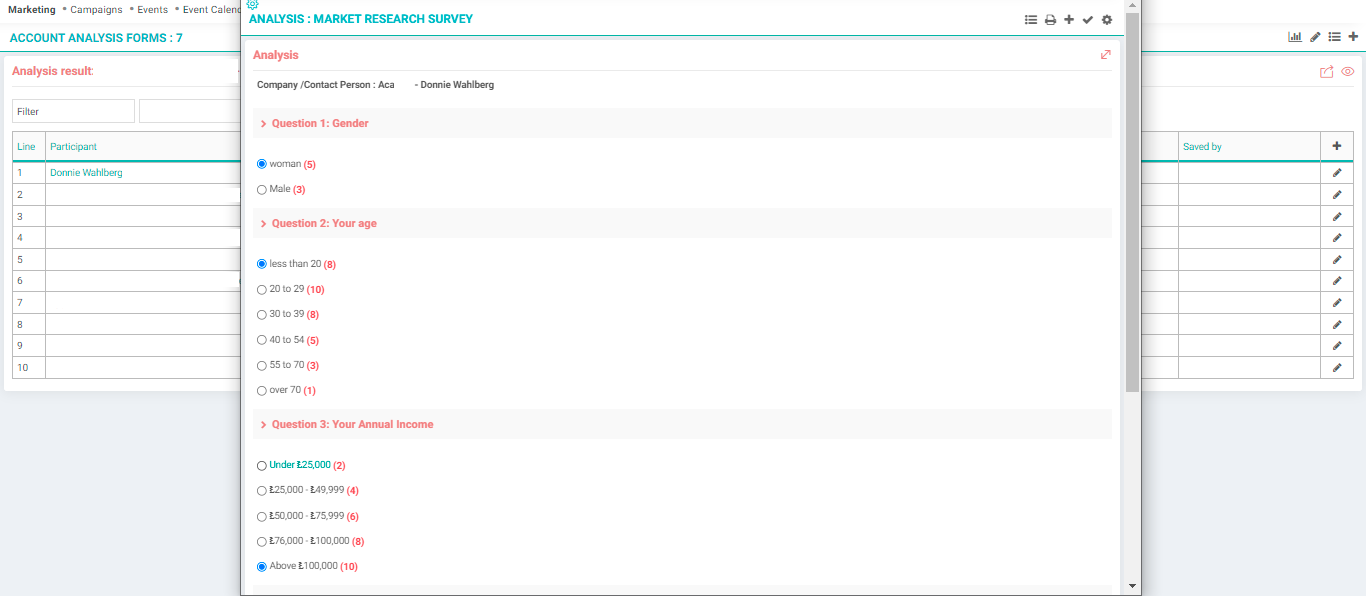
On this screen, fill the form according to the account's answers and click "Save". The result of the form will be displayed on the “Analysis Result” screen.
Seeing All the Evaluations Made with the Analysis Form and Updating the Filled Form
Click on the relevant form title in the Account Analysis Forms list.
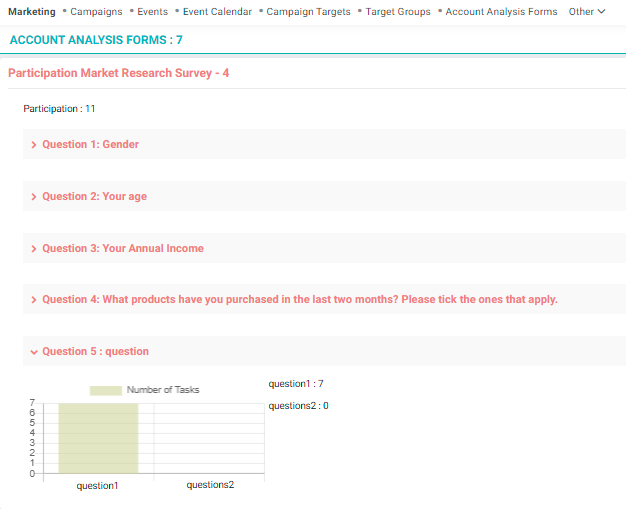
All account names evaluated with that analysis form and the scores they received as a result of the analysis are displayed as a list.

You can update or delete the surveys by clicking the icon at the end of the line in this list.
Also on this screen; You can view the results in charts by clicking the “Results” icon at the top of the page.